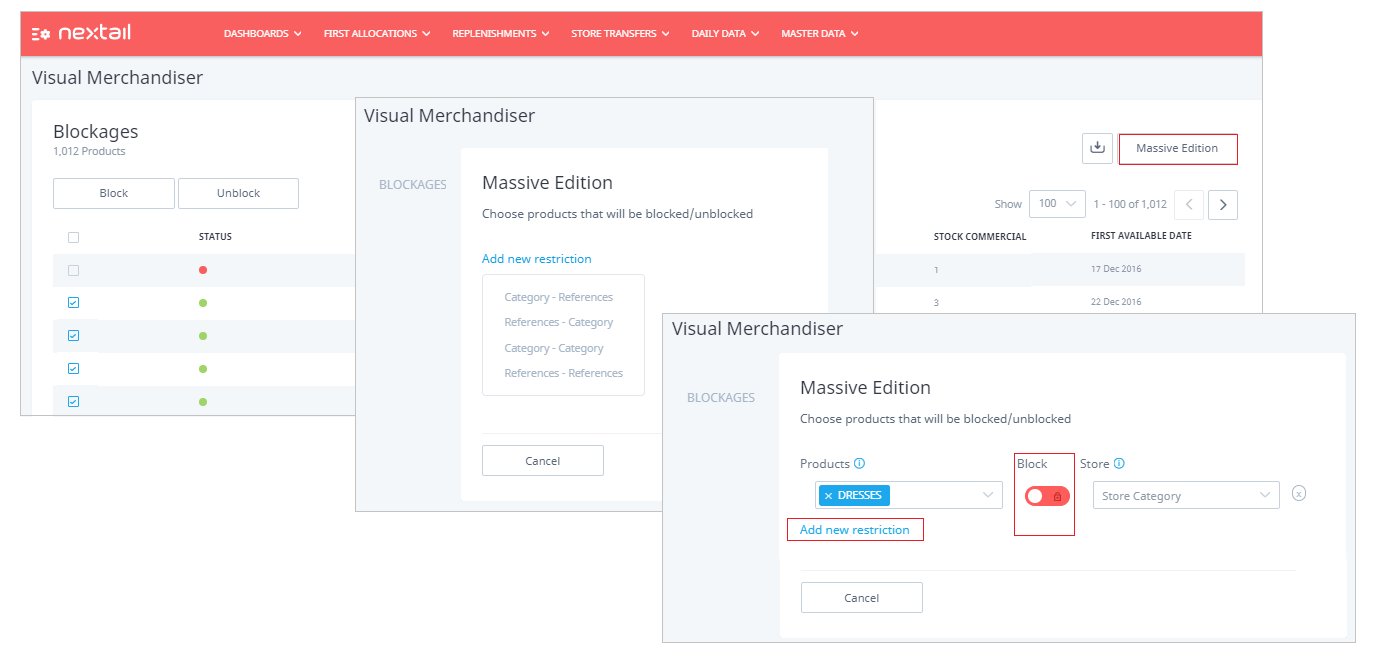
You can prevent certain products from being sent to stores through the "Visual Merchandiser" option available in Master Data Menu or "Data upload" in Daily Data Menu.
Visual Merchandiser
- Go to the “Master Data" menu and select "Visual Merchandiser”.
- Tick the products to be blocked from being sent to a given store, and save the changes by pressing the “Block” button.
- You can also unblock previously blocked products by ticking them and pressing the “Unblock” button.

If you need to block/unblock a number of products, use the “Massive Edition” option.
- Go to "Massive Edition".
- Select the option that meets the restriction, i.e.: Block a specific product category and even within a certain store category (categories already created).
- Once the desired group of products and/or stores has been selected, select block/unblock option. You can also add new restrictions later.

Data Upload
- Go to the “Daily Data" menu and select "Data Upload”.
- In Data type, select "Layout Master FA" or "Layout Master Rpenishment". This option lets you upload the store layouts and block/unblock products in replenishment or first allocation modules.
- The file must contain 4 columns, named exactly as in the picture below so each line allows you to refer to a product-store combination:

ProductRef: This is the product reference.
StoreCode: The code store.
Replenishment or Replenishment_FA: These columns should contain:
"1” if we want to restore /allocate
“0” if we want to block
Note: You can ask the Nextail team on how to set blocks at SKU-store level.
.png?height=120&name=Nextail-logo-rojo%20(5).png)