Categories are used to take actions such as creating promotions, running scenarios and view data at an aggregated level within Dashboards.
In particular, manual categories can be created on your own through the Categories page or Data upload page.
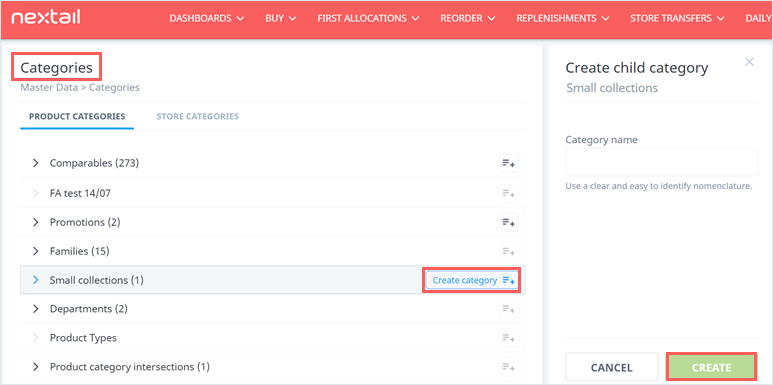
Categories Page
- In Master Data > Categories page, you will be able to create a child category to fill with products or stores afterwards.
- Categories tree are divided into two main sections: Product categories and Store categories. Click on the “Create category” button to the right side of the category name.
- Write the name of the new category and click “Create”
To take into consideration:
- The creation of root categories is not allowed
- Under categories with an arrow and additional icon in black you can create children categories. The grey icons refer to automatic or read-only categories.
- Alphanumeric characters are permitted in the name and a max. length of 100 characters.
- New categories with the same name of an existing one will be created with a suffix: (1), (2), etc.
Data Upload
Go to Daily Data > Data Upload, select the option “Category creation” and choose the file to be uploaded.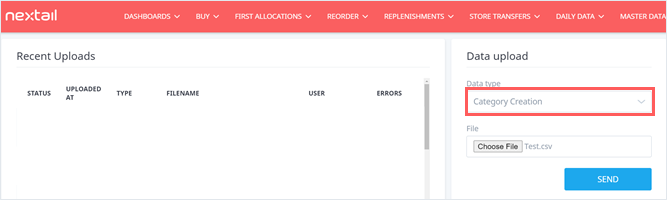
The file must contain the following columns:
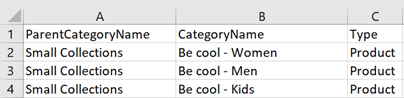
ParentCategoryName: name of the manual category which will be the parent of the new category
CategoryName: name of the category to be included
Type (optional): specify if this new category is meant to the Product or Store tree
Important considerations:
- All created categories must have the first letter in uppercase
- This function does not allow to create a category with the same name and different letter case than an existing one.
- The creation of root categories is not allowed